Cisco SPA 112 configuration
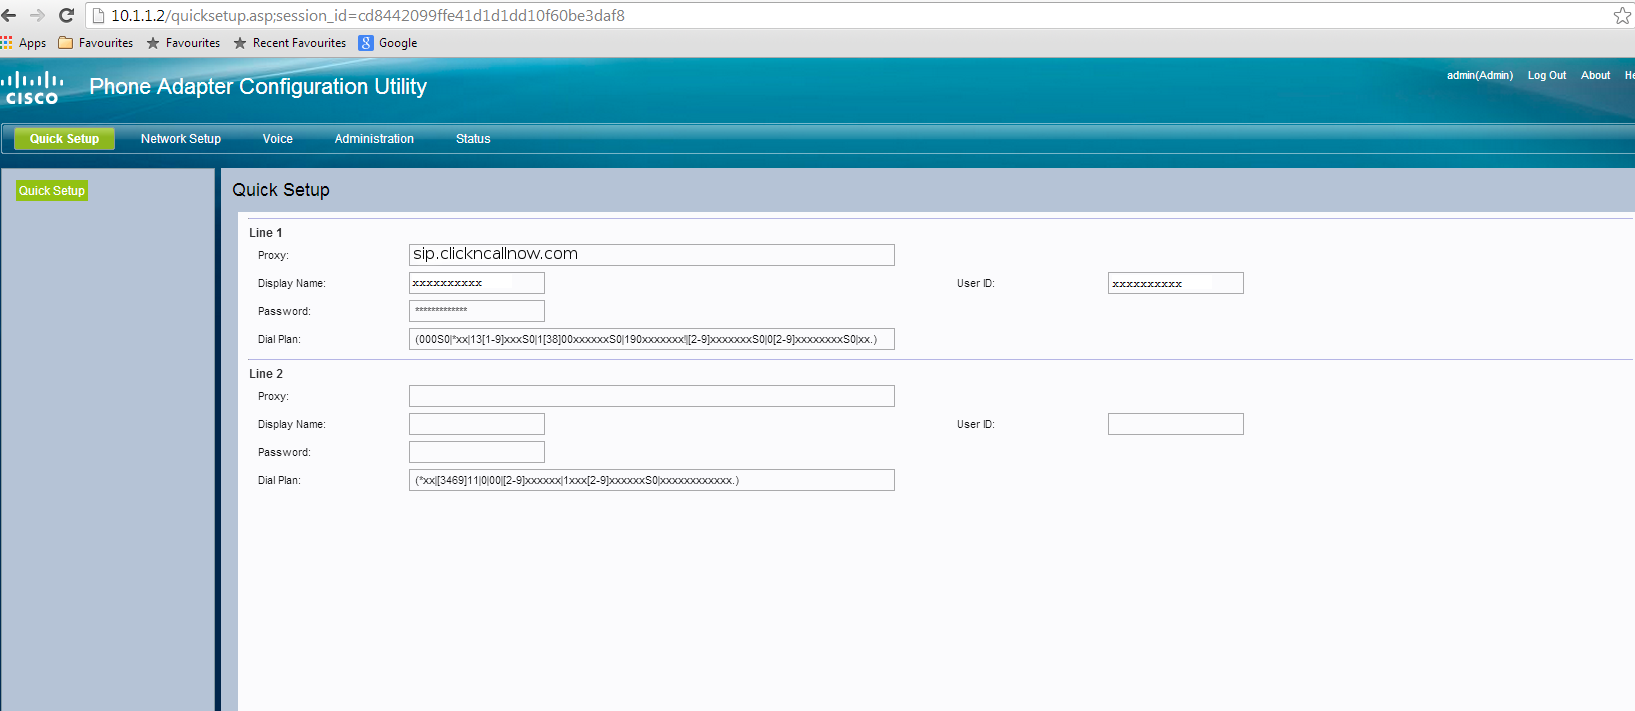
Step 1
Log into web interface of your SPA112.
Enter the following under quick setup:
Proxy: sip.clickncallnow.com
Display Name: 10-digit username
User ID: 10-digit username
Password: [password as shown in Welcome email]
Dial Plan: (000S0|*xx|13[1-9]xxxS0|1[38]00xxxxxxS0|190xxxxxxx!|[2-9]xxxxxxxS0|0[2-9]xxxxxxxxS0|xx.)
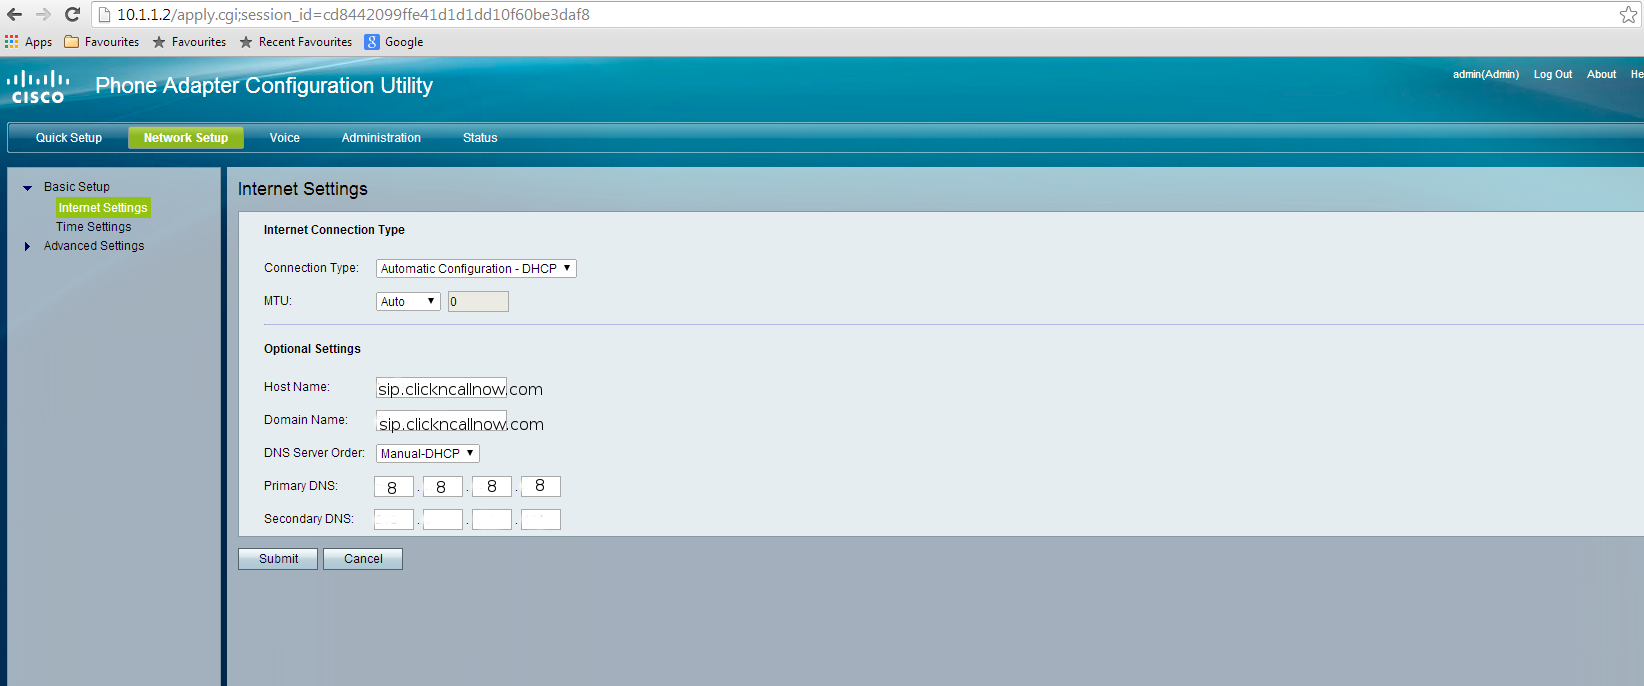
Step 2
Next select the network setup tab.
Host name: sip.clickncallnow.com
Domain Name: sip.clickncallnow.com
DNS Server Order: Manual-DHCP
Primary DNS: [yourDefaultGateway or 8.8.8.8]
Secondary DNS: 8.8.4.4
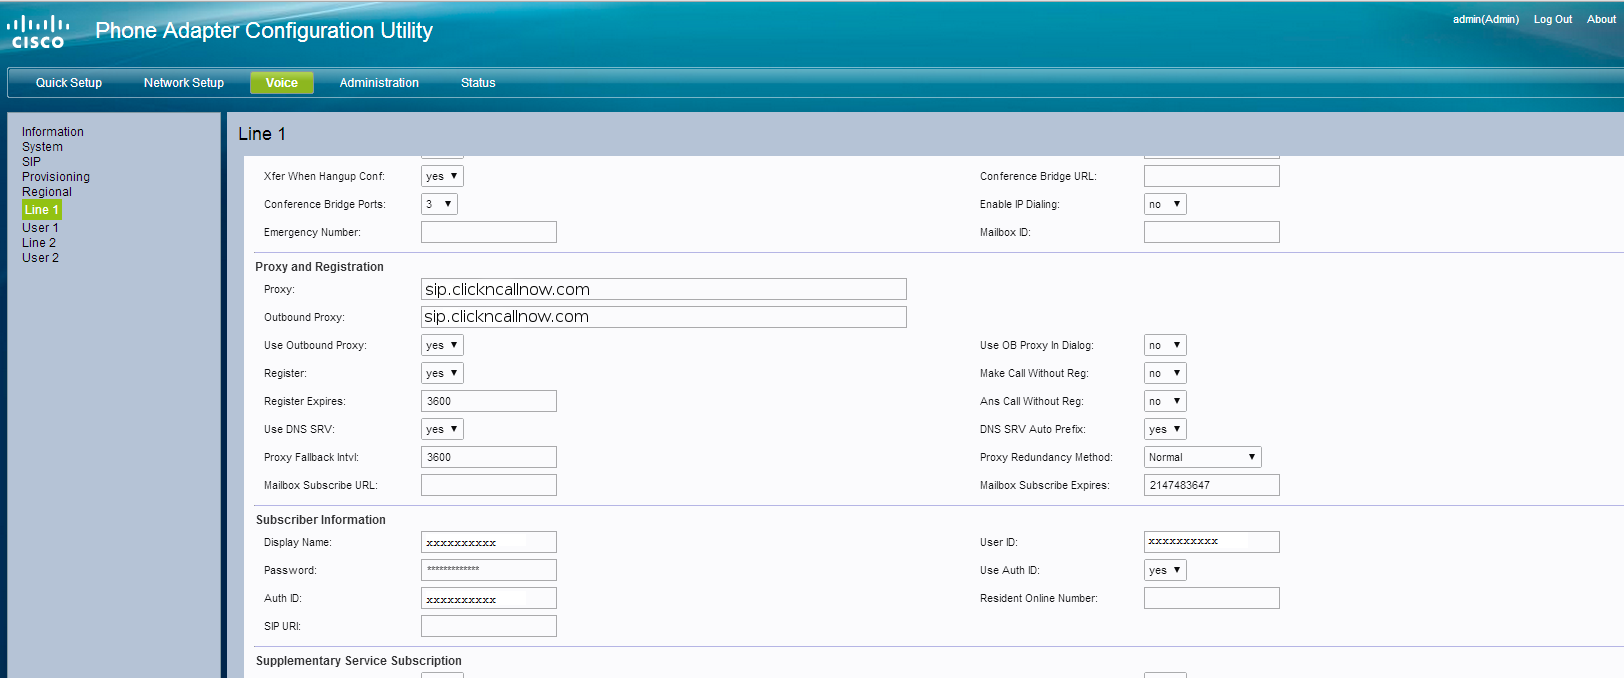
Step 3
Next select the voice setup tab.
Select Line 1 from left hand column.
Proxy: sip.clickncallnow.com
Outbound Proxy: sip.clickncallnow.com
Use Outbound Proxy: Yes
Use OB Proxy In Dialog: No
Use DNS SRV: Yes
DNS SRV Auto Prefix: Yes
Display Name: 10-digit username
User ID: 10-digit username
Password: [password as shown in Welcome email]
Use Auth ID: Yes
Auth ID: 10-digit username