Gigaset DX800A VoIP configuration
This is an example of setting up your Gigaset DX800A device to use with the ClicknCall service (reference only). We strongly advise you read your device manufacturer's user manual before proceeding.
-
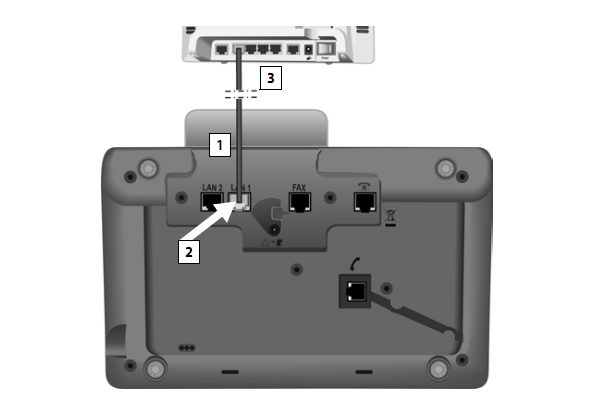
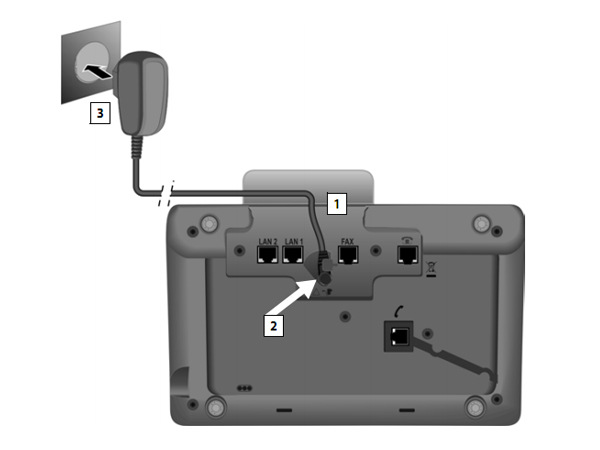
First step is to plug in the LAN cable to your model/router and power cable.
-
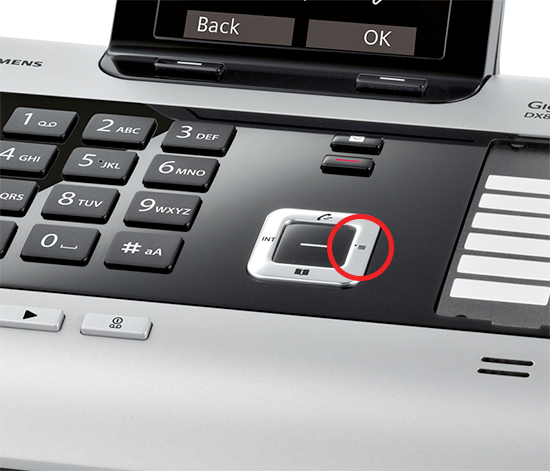
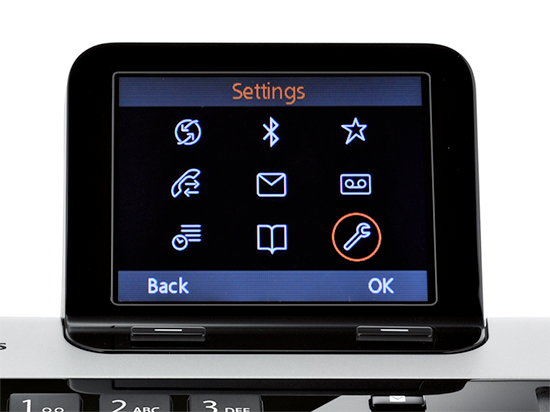
Once your device is fully booted up press the MENU button located on the face of the base station, as indicated by the screen shot below:
-
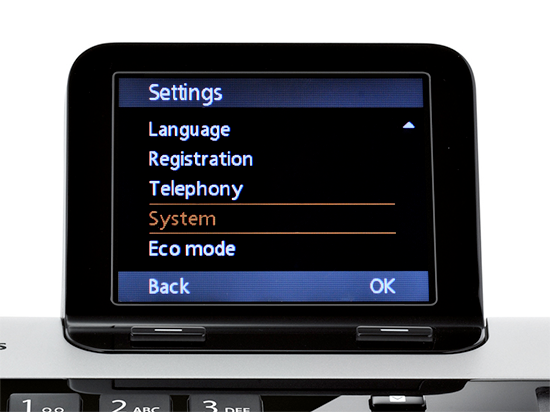
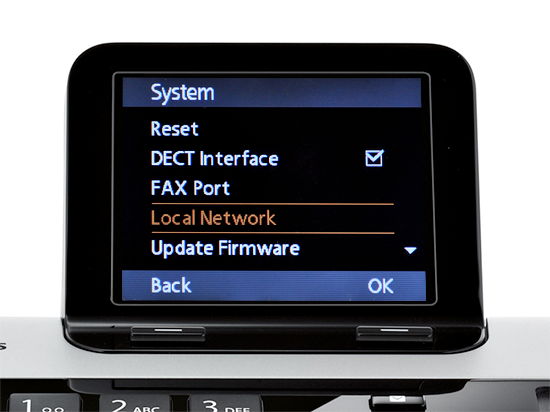
To acquire the IP address, navigate to "wrench" icon -> System -> Local Network and take note of the IP address you receive.
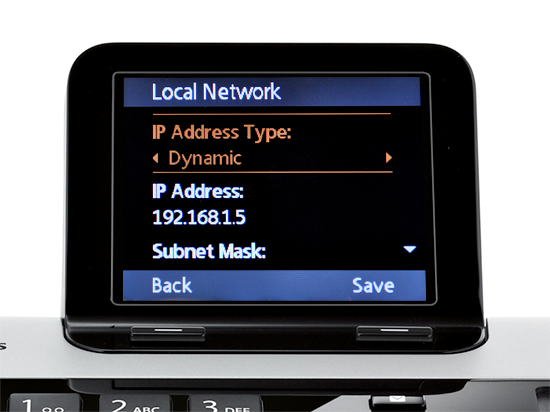
- Once you have the IP address of your device, open a web browser on your computer such as Internet Explorer, or Firefox and enter the IP address you've saw on the phone's interface (I.E. where you would normally enter www.yahoo.com). You should be greeted with the login screen:

- Enter the system PIN for the DX800A on the given field.
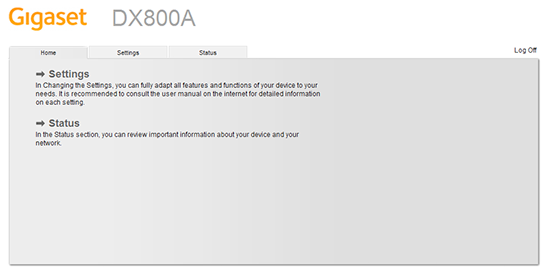
The default system PIN for the DX800A is 0000. Once logged in you should see the splash screen for the DX800A:
You will now begin configuring the device to connect to your ClicknCall account. On the Settings configuration page, click the Telephony link in the side menu bar then click Edit for the Connection you wish to configure ClicknCall on.:

- Once you click Edit you will want to click on the Show Advanced Settings button, and use the following settings:
Connection Name or Number: ClicknCall
Authentication name: 10-digit username
Authentication password: The password as shown in the Welcome email
Username: 10-digit username
Display name: 10-digi username
Domain: sip.clickncallnow.com
Proxy server address: sip.clickncallnow.com
Proxy server port: 5060
Registration server: sip.clickncallnow.com
Registration server port: 5060
Registration refresh time: 180
STUN enabled: No
STUN server address:
Outbound proxy mode: Always
Outbound server address: sip.clickncallnow.com
Outbound proxy port: 5060
It should look similar to the following screen: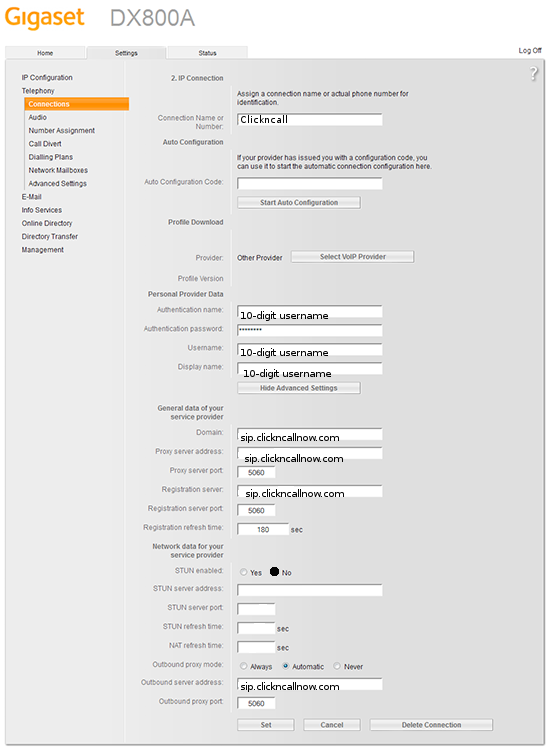
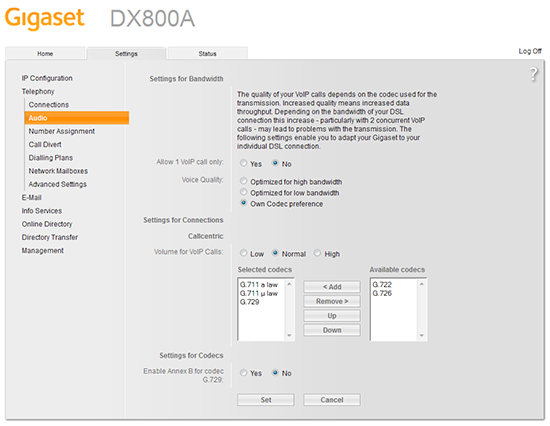
- Next, click the Audio option, followed by the Show Advanced Settings button and ensure that the G.711u, G711 a and G.729 codecs are the only codecs listed under the Selected Codecs option. Once done, click on the Set button to save your changes. Your configuration should look similar to the one shown in the picture below:
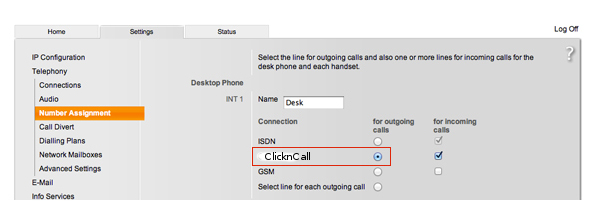
- We will now have to make sure incoming and outgoing calls are routed properly. To do this, click on Number Assignment,
then select the radio button under for outgoing calls that corresponds to the ClicknCall account and ensure that the checkbox under
for incoming calls that corresponds to the ClicknCall account is also checked. Once done, click on the Set button to save your changes.
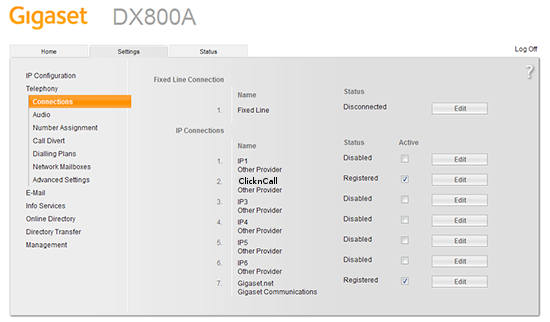
- You should now be registered and can check this on your status page.